Sunday, December 24, 2017

The Mighty Mouse of the kitchen.

Do you remember when Mighty Mouse would suddenly show up with his cape flying and say "Here I am to save the day!" ?

Well I do and tonight my Instant Pot made me think of good old Might Mouse.  It was a busy day, I had no plans for dinner and I really hate when that happens.  Another thing I hate is when I have food in the fridge that needs to be used before it goes bad and I have no idea what to do with it.

Tonight I grabbed some of the things I had in the fridge and headed over to my Instant Pot.

I had some fresh broccoli, pasta, assorted cheeses, sour cream, cream cheese and my husband's favorite - those Little Smokies sausages.
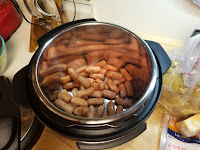
 I put the Little Smokies in the pot a covered them with pasta to about 1/2 way up the pot.  Then I covered it all with water until you could just see the water almost to the top of the pasta. I closed the pot and set manual pressure for 3 minutes.

While the pot was cooking I chopped and grated the cheese.  I had some Swiss, Cheddar, Velveeta and Colby. 

I stopped when I grated a little more than cheese!


After 3 minutes were up and the pot was done I let it natural release for about 3 more minutes.  Then I manually released the pressure.  I added all the cheese and slowly mixed it in.  It was very thick so then I mixed Sour Cream and some Cream Cheese to loosen it up a bit.
It turned out thick and yummy and cheesy with those awesome Little Smokies mixed it.  The entire meal took about 20 minutes.

So I feel like my Instant Pot really is like Might Mouse.  I can almost here it call out....
 
"Here I am to save the day!"

Sunday, December 3, 2017

Chicken Curry in 15 minutes!

This is my favorite brand of curry.
 When we lived in Japan we used to have something they called Vermont Curry.  It was a mild curry that was perfect with chicken.  One time I was at my friend Masayo's house and she was making Vermont Curry for us to have for dinner.  I noticed the box she was using and realized that what I thought was some kind of secret, super special yummy curry was something I had seen in American grocery stores.  This comes in three flavors, there is a green box, a red box and this orange box.  I don't know what the other ones taste like because I have only ever used this brand. 
Anyway, you can see that I followed the directions and put 2 1/2 cups of water in the pot.  Then I broke the curry pieces up and dropped them in.   I used two leftover chicken breasts, a couple carrots, 4 or 5 small potatoes and a couple stalks of celery.  I chopped them up and dropped them in too.

I closed up my Instant Pot and set it on manual for 4 minutes.  Before I started on the curry I had already put rice in my little mini pot.  Rice in the Instant Pot comes out perfect every time.  One big secret is to rinse the rice really good before you put it in the pot.  White rice is a 1:1 ratio of rice to water.  I also put a little drop of butter in there too.  That helps with foaming.  When it's done just fluff it with a fork and there ya go...perfect rice!

After the Curry cooked for 4 minutes I released pressure and all I had to do was stir it around a bit to mix it all together.  Here's the finished meal.  Delicious!  Chicken Curry over rice. 

Sunday, November 26, 2017

Terrific Beef and Broccoli in my Instant Pot - So good!


Tonight I made a super easy and super yummy Beef and Broccoli dinner.  It's probably pretty much the same as most Beef and Broccoli recipes you'll find for the Instant Pot but this is how I did it.

 The first tip I have is to cook the broccoli first then add it to the finished beef mixture. The reason I do that is because I like it to keep from getting too soft. 
So, here I have it in a steamer in the Instant Pot and I'll steam it for 2 minutes.  You can see from the photo on the right the finished broccoli keeps nice color.


 I also cook rice while early.  I like to cook it in my Mini Pot because it will keep it warm until everything else is ready.  I really love using the electric pressure cooker to make rice because it turns out perfect.

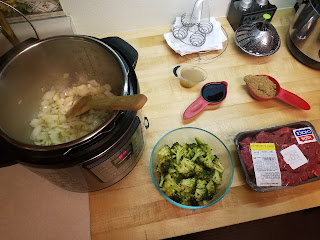
 Prepping all the ingredients makes things so easy.  This recipe calls for ...

 1 small onion chopped
 3 cloves of crushed garlic (I used 1 1/2 tsp minced from a jar)
1 to 1 1/2 lb beef cut into chunks
3 tbsp. sesame oil
3 tbsp. olive oil
1/3 C soy sauce
1/4 C beef broth
1/2 C brown sugar
1 lb broccoli1
2 tbsp. corn starch
2 tbsp. water

Add both oils to pot on the saute setting.  Saute the onion and garlic until translucent. Add the beef and brown slightly.  It will cook in the process so you don't have to brown very much.  Then add the soy, beef broth and brown sugar.  Close the pot and cook on manual for 10 minutes.  When it's finished quick release the pressure.  While the pressure is releasing mix the corn starch and water. Add the broccoli and mix it in.  Then put the top back on for about 5 minutes or until the broccoli is hot. Then add the corn starch mixture to the pot and stir until it's thickened.


 OH MY GOODNESS!  It smells wonderful and look how yummy it looks in the pot!

Serve it over the hot rice for a delicious meal.


I hope you try this and I hope you love it.  If you have any tips or ideas for this recipe let me know!

Late night thinking....

So here I sit at 1:50 a.m.  There's no real reason for me to be up I just can't sleep.  It's ok though because it's quiet and I can work on my 2leelou Preserves things without any distractions.  I have been looking at lots of recipes to make in my Instant Pot.  I just can't decide because everything looks so yummy!

I am also gathering information to put together a workshop.  On Jan 20th I will be doing a workshop called "Your Convenient Kitchen".  It's the perfect workshop for after the Holidays.  Lots of people will get new Instant Pots and other kitchen things and this workshop will help everyone get the full benefit of those new goodies. 

We will talk about lots of things, not just Instant Pots.  For instance, there are lots of things you can do with a slow cooker or even a rice cooker.  Did you know you can cook a main course in a rice cooker?  It's not just for cooking rice.  You can even make custards and cakes in them! 

Then of course, which appliance uses the least amount of energy?  Which one retains the most nutrients?  See, these are the things that really surprise people.  And when you know more you can get more use out of an appliance. 

I'm really excited to do this workshop.  It's so much fun to stand in front of a group of people and watch their faces when you teach them something that totally blows their minds.  I love it.

It actually happens a lot in the Dehydration workshop. When I explain how to dehydrate cooked pasta and then the participants see it they are amazed. 

Anyway, having the workshop in January will really help get 2018 off to a good start.  2017 has not been my favorite year by any means and I'll be so glad to have a new year.  And to get 2018 off to a great start I hope you all get some new fun kitchen goodies for the Holidays and learn all the fun ways to use them!


Monday, August 21, 2017

I'm a Pot Head now!

So here's the deal.....I LOVE MY INSTANT POT!

I have been looking at so many delicious looking recipes I can't wait to try them.  I had a recipe I wanted to make for dinner tonight but then I realized I had leftovers I needed to use up first.

Reheating leftovers?  Oh yes the Instant Pot will do that perfectly!  It's very simple.


I put the pork and BBQ sauce in a Pyrex bowl and covered it with foil.  I created a foil strip that could help lift the bowl out of the pot when it's hot.  I put in one cup of water and the trivet in the pot and sat the bowl with the leftovers in the pot.

This is the Pot in Pot method.

I used the 'Steam' function and sat it for 5 minutes.  While that was reheating I had some fresh zucchini that I sliced and put in my little pot on the low pressure setting for 3 minutes.  Of course I had water and the trivet in there too.


Everything from start to finish was about 20 minutes and it came out perfectly.

So there ya go, the perfect way to reheat leftovers!


Sunday, August 20, 2017

I'm going Instant Pot crazy!

I have had an electric pressure cooker for years.  I also have three stove top pressure cookers.  So as you can imagine, I've done plenty of pressure cooking.  I started checking out the new features of the newer models of electric pressure cookers and I'm impressed.  My old one has no real features but High or Low pressure and time adjustment.  I actually got excited when I saw what the newer models can do.  Not only for the convenience of the features but for the fun I could have using them.

So, today I officially became an Instant Pot gal.  It was just time for an upgrade. My old one was very narrow at the base so I couldn't really do any cheese cakes etc.  Also the pot was not a full pot it was actually a very heavy insert that had a plug part that made contact when it was inserted into the body of the pot.  That part wasn't even submersible so it was kind of pain to clean up.

My new addition will take the place of my old pot on the counter.  Right next to my mini one.  Between the two of them I'll be making tons of fun and yummy things!


Tuesday, September 27, 2016

Lazy Lasagna - so easy and so good

I love having lasagna for dinner but hate making it. This is a great way to make a nice lasagna dinner without the hassle.

You only need three ingredients - Spaghetti sauce, frozen Ravioli (I like beef filled) and Mozzarella cheese. As far as exact amounts there aren't any.  Just use what you need for the size of pan you are using.  Tonight I used a  9 x 13 pan so I used two bags of frozen Ravioli.

I do like to make my own sauce because I like to use my home canned things.  Tonight I used a pint of stewed tomatoes and a pint of tomato sauce from my pantry.  I looked through my fridge and used up some things from there.  I used some zucchini, mushrooms, onion, minced garlic and a yellow bell pepper.  I also added some basil, oregano and parsley from my herb garden.  I put it all in my little pressure cooker and cooked it for 10 minutes. I love using my pressure cooker because it only takes 10 minutes but tastes like it cooked in a slow cooker all day.  I don't measure anything I just toss it all in there.  It turned out great.  If you don't want to make your own sauce just grab a jar of store bought sauce. Using already made sauce will save time too.

 So now all you do is spray the bottom of a pan with non-stick spray and put a little bit of sauce over the bottom.  Then line up the little frozen Ravioli.  Don't thaw them either, there is no need to. Just line them up in nice little rows.

  Now you cover them with sauce and sprinkle cheese over them.   


Continue to layer the Ravioli, sauce and cheese until you have as many layers as you want.  For this 9 x 13 pan I used two bags of Ravioli. Each layer used 24 pieces and I got four layers from the two bags.  Leave enough sauce and cheese to cover the top of the final layer.

Final layer covered with sauce and cheese.

Bake it in an oven at 350 degrees until it's hot and bubbly throughout.  This large pan took about 50 minutes. It looks delicious!  And as you can see from the serving on the plate it has all the layers you would expect from a regular lasagna.  
Hot and bubbly!
Served with a salad makes a wonderful dinner!

Serve with a side salad and some garlic bread and honestly most people would never know you made it from frozen Ravioli! 


Thursday, September 22, 2016

Blueberry/Huckleberry Jam - Delicious!

Did you know that you can use Huckleberries in any recipe that calls for Blueberries?  Well, you can.  I have a bunch of both (frozen) so I decided to mix them and make Blueberry/Huckleberry jam.  It turns out delicious.  Take a look at how much smaller the Huckleberries are than the Blueberries. I understand that in other parts of the country Huckleberries are a lot bigger than the ones we get here.

In order to get a good recipe I went to my good old trusty So Easy To Preserve book from the University of Georgia.  The recipe is easy and turns out great.

Since this recipe is only processed for 5 minutes the jars have to be pre-sterilized.  Any recipe that is processed for less than 10 minutes must have the jars pre-sterilized.  If the processing time is over 10 minutes pre-sterilizing isn't necessary because it will take place during the 10+ minutes in processing. However, lots of people feel better if they pre-sterilize jars anytime they can.  It's ok, not a big deal it just takes extra time.  So, to pre-sterilize your jars all you have to do is put them in the canner filled with water and let them boil for  10 minutes.
This recipe calls for 9 cups of crushed berries and 6 cups of sugar.  That's it, nothing else, how easy is that?
I use a potato masher to crush the berries. Then I put them in a pot ready to put on the stove and add the sugar.


Once the sugar is added and you continue to stir it so the sugar dissolves you will notice a lot of liquid develop. That's perfect because you have to bring it to a boil.  Once that happens you will simply continue to cook it down slowly until it becomes thick or to the jellying point.  The thicker it gets the thicker the jam will be.

Once it's thickened up you will pour it into the hot sterilized jar, wipe the rim, put on the lid and the ring and put it in the canner.  Fill all the jars.  Once they are in the canner it must come to a boil to begin the 5 minute timing.


After the 5 minutes of processing remove the lid and wait another 5 minutes. That helps keep the jam from siphoning out of the jars. When you remove them from the canner, set them on a rack or towel undisturbed for 12 hours.  Then remove the rings, wash the jars well, label them and smile. You have delicious jam ready whenever you want.  YUM!


Tuesday, September 29, 2015

Canning Coho- Oh so good!

I'm so glad our son likes to fish.  Actually. I think it's more like he's obsessed with fishing. All the fishing he does and he won't eat it.  He never has liked fish.  When he was a little guy I told him fish sticks were chicken sticks once, he didn't buy it, he knew right away and refused to eat them.

But hey, that's good for us because he gives away what he catches.  Today he gave us two beautiful Coho Salmon.  Coho are the absolute best.  And you know me, I'm always looking for something to preserve. So tonight I am canning salmon.

He gave us a salmon (not Coho) a few days ago and I canned that one.  One fish yields about 7 pints.  I got 7 pints from that Salmon and tonight I got 14 pints from the two he gave us today. So from those three fish I have 21 meals!  And let me tell you, Salmon patties from home canned salmon are amazingly good.

Here's the process for canning the fish tonight...

Here's the fish and cleaned jars. I'm even super lucky that our son cleans and fillets them so I don't have to.


Here are the 14 packed jars ready to put in the canner.  Jar rims wiped with vinegar, hot lids on with rings finger tight.

I used my taller pressure canner and was able to put two layers of 7 jars.  That sure saved time because if I could only do one layer at a time (like I would have to do in my smaller canner) I would have to do two batches.  Remember you have to vent the steam for 10 minutes then process  fish for 100 minutes so two batches would have taken a long time.

After the canner vented for 10 minutes I put the weight on and waited for it to come to pressure.  The 10lb weight began to rock right as the dial reached 11 pounds pressure. That's perfect for my altitude. Remember to check your altitude to make sure you are using the correct pressure for where you are.  When it got to the correct pressure I set my timer for 100 minutes.  Well actually my timer doesn't do 100 minutes but it has the ability to set two different times so I set one for 60 minutes and the other for 40 minutes. Once the 100 minutes had passed and the final timer went off I turned off the heat and removed the canner from the burner.  After the pressure fell back to 0 on it's own I tested the weight to make sure no steam came out when it was moved. Then I removed the weight and took the lid off.  Remember to lift the lid away from you because there is still some hot steam that will be released from the canner.  The jars set in the canner for about 5 minutes before I took them out.  You know why you do that?  Because the liquid inside the jars is boiling and the lid is still sealing, If you take them out, the sudden rush of cold air can make them spurt a little liquid out.  If that happens it may not only cause the jar to lose liquid but the liquid can get on the rim of the jar under the lid and prevent the lid from sealing properly.  So don't get in a hurry, let them sit. 

Here they are, 14 pints of delicious home canned Salmon!  

Now I'm off to find some more recipes to use canned salmon in.  With all this on hand it will be nice to have some variety.

I hope you all have the opportunity to can fish.  It doesn't have to be Salmon.  Check out what fish is available in your area then check out an approved recipe and can some.  You'll be glad you did.


Sunday, September 27, 2015

It's Firewood Season!

When fall gets here it's really firewood season at our house. I had fun splitting a bunch of wood today.

I'm not so good with the axe but I do love hitting the splitting maul with the sledge hammer and watching the big round of wood split apart.

My husband can split them quickly with the axe so between the two of us it didn't take long to get this wood split and stacked.

Now I'm just waiting for it to get cold enough to have the fireplace going in the evening.